I used the still morning to spray one side of the Livingstone el cheapo guitar this morning. Boy the things you forget after 10 years of not doing a lot of this stuff.
Note to self Acrylic Lacquer really needs some excellent prep work or every single previous scratch or sanding mark stands out like the proverbial "dogs balls" ..........well at least to me because I know where to look.
I'll let it cure for a while or until I can't stand it any more and have to paint again lol hopefully a week
I'm thinking about how to finish it off, should I hit it with some 1200 wet and dry then clear coat it, or hit with some wet and dry then another coat and then try to buff it (I don't have any buffing gear at all, More bloody money, sigh!)
After building my sliding bevel and finding out they only cost about $8.00 from Masters I found this video (Probably through another uke builder) and decided I needed to do this. The cheapest one (cam clamp) I found locally cost just under $10.00 at my local bike store, so only do it if you have more money than sense lol.
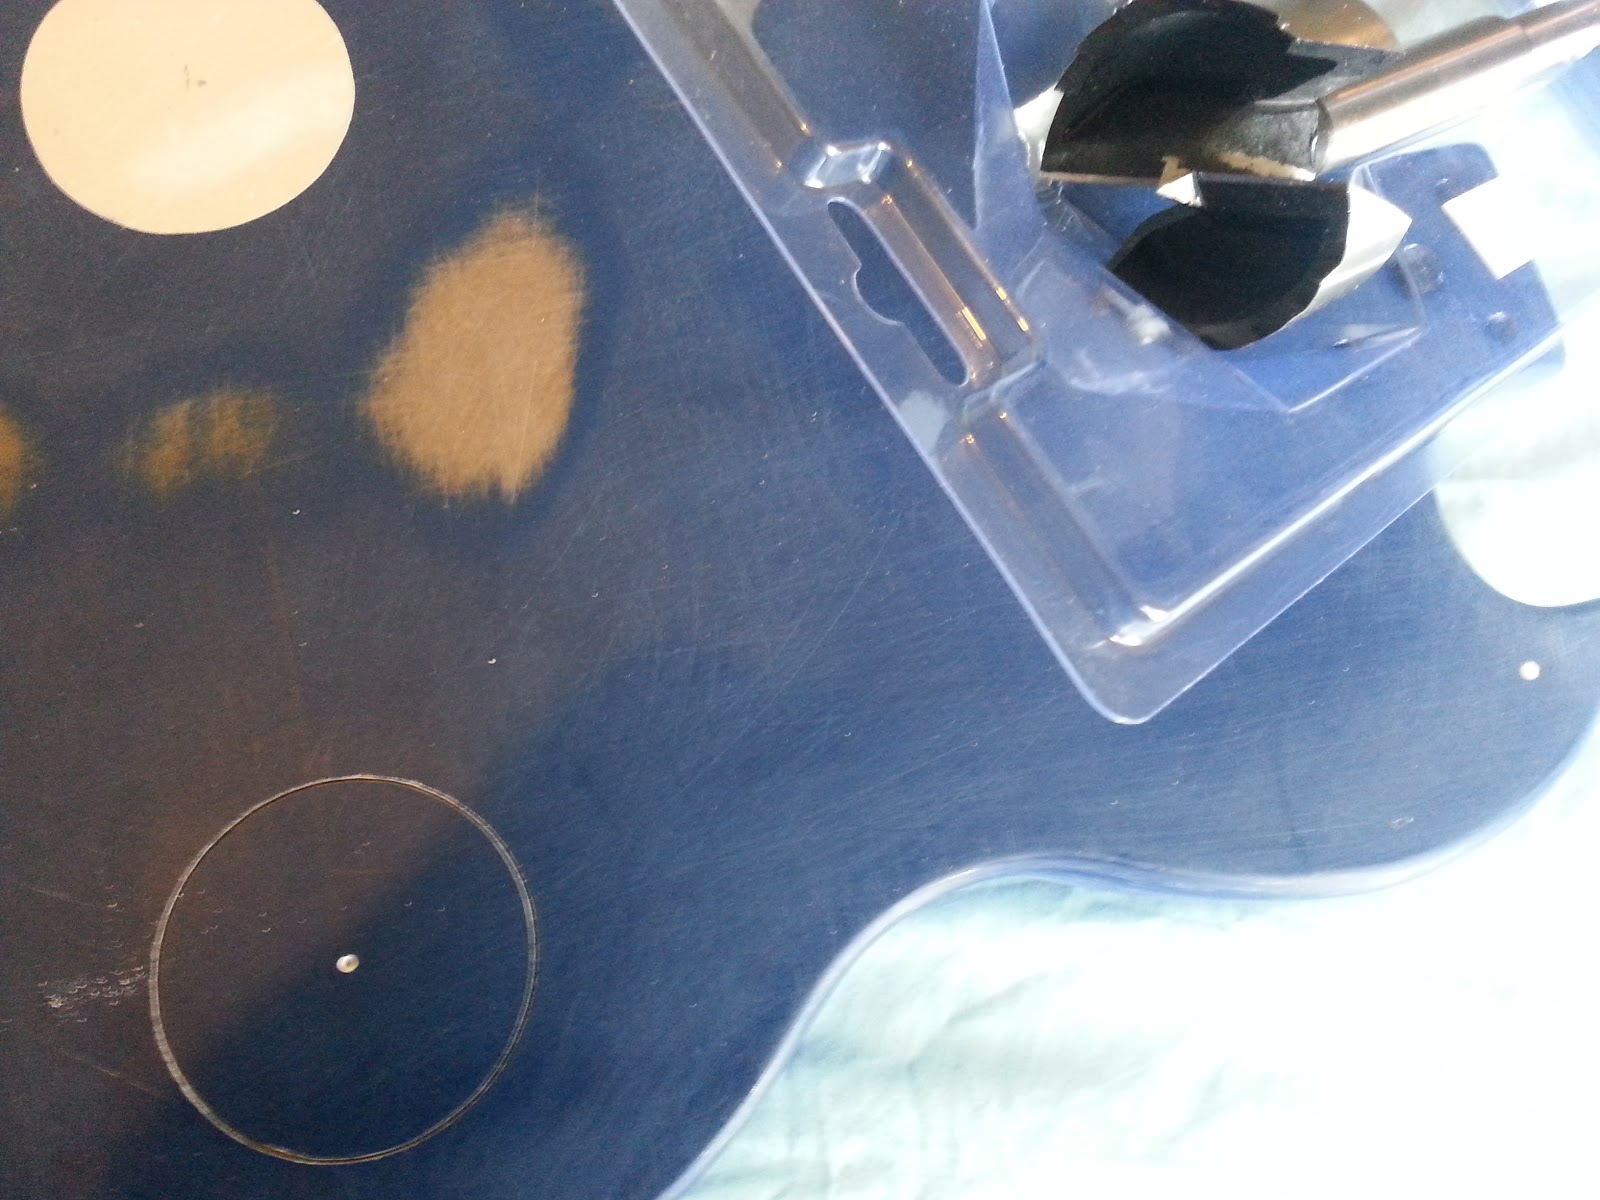
I got a little excited and didn't capture any stills of the holes being drilled. As a consequence of the hurried state this didn't make for the best job I could have done. In hindsight I would have made a wooden triangle to match the angle I needed to drill a hole from under the bridge to the volume pot hole (this is an earth lead that is required) It was ok, but by my anal standards it left a lot to be desired, even if no one will know unless I point it out to them.
I'll be spraying the top in about 1/2 an hour but will take it outside for the undercoat as it's pretty thick and will be sanded with some wet and dry.
nb I'm using Acrylic Lacquer for the undercoat and probably for the top coat as well. Mainly due to price. I can also get AL in spray cans as I don't want to have to buy all the accessories thinners etc for anything else. I do have a spray gun and compressor but nowhere to spray here.
This was always a test job to find out if I could make things here and what I needed to do to achieve it in my flat. The one thing I need more than anything else is patience, patience to take my time and build the little jigs that will make many of the tasks so much easier.
I spent this morning making a new slide for the bevel slide. I'd realised that I made the other one a little short. I've still got some sanding to do but it works a treat.
The angled cut on the end is 45 degrees so I can use it to set some angles but I'll probably just end up using my protractor for most angles.
The new 50 mm Forstner bit beside the guitar body. You can see where the old volume pot was and where I've scribed for the new hole.
It's a saw toothed bit and I only need to go in a couple of mm and then I change to the 40 mm Forstner bit to go in another 29? mm or so. After that, all I need is a small 9 mm bit for the volume pot to stick through.
I will need to drill a hole from the top on a steep angle to join the bridge and hole for the earth lead, and drill a hole into the side that ends up inside the hole for the guitar lead to plug into.
For the hole from bridge to volume hole I've got a couple of extra long drill bis one at 6 mm x 300 mm (about a foot) the other at about 4.5 mm (I'd need to check that though)
I'm not sure when I'll get around to doing this as I've got a busy week coming up.
I thought I had one but can't find it so I decided to make one. It only took a couple of hours and all it needs now is to round over one end and to make sure it closes a little better with some finishing sandpapering in the slot.
I'd like to swap out the nut and bolt for one with a wing nut, but I will have to wait until I can go to the Hardware store
Based on the following link I've printed some protractors to allow me to set my sliding bevel
I cut out a notch for my thumb to push on the blade on one side and rounded off the end which proved to me just how much easier this would be with a shelf to rest my stock on while I use the disc sander
Here I am taking the new Disc sander for a test sand in my drill press, by laying it on its side. It occurred to me that with some timber I could modify a frame so the drill press becomes the power source for the lathe disc sander combo. It's worth some plans in 3ds Max. I could hinge the drill press to a base of some kind, so all I'd have to do is to lay the drill press over and attach any necessary accessories. WARNING! DANGER, DANGER WILL ROBINSON the chuck is only held in by a taper and it wasn't designed to take on lateral stress, be WARNED it could come flying off do not try this unless you know what you are doing and have assessed the danger to yourself and those who may be around you.
Fixed some hook and loop to the MDF platen and some 120 grit to that,
it works like a charm.............................
I've also been making a prototype fretting hammer out of Tasmanian Oak an Aussie hard wood
I'll be gluing some leather to one of the faces and possibly making one of the faces a lot narrower so it can get in between the frets on a uke.
I routed a chamfer onto all the edges in a way that I'd rather not document lol. Needless to say it wasn't all that neat and has lots of unnecessary dents and wobbles. So until I get around to making a router table, it will have to do.
I picked up a leather belt from the Salvation army store for $3.00 to use it on the end of my hammer to soften the blow so the hammer doesn't dent the frets. It is of such good quality I wouldn't be at all surprised to find the same belt selling for $40 - $50 in some high end ladies fashion shop. It's about 50 mm wide.
Like I said, I shaped one end of the hammer so it was narrower. Here it is having the leather glued to it, using an epoxy glue.
The nearly finished hammer after the leather has been glued to the faces.
The hammer has lead weights inserted inside the laminated head of the hammer which wasn't really necessary but just for my own entertainment. The idea was to make it a dead blow hammer so when you landed the blow it didn't bounce back up it just stayed down after the blow.
Tomorrow I'll spend some time sanding the roughness from it. I'm very happy with it all things considered.
I've been looking at videos on YouTube on making a disc sander and stumbled onto the video below.
Now I'm making this drill powered Disc sander / Lathe
Most of the videos on disc sanders are of the 12 inch / 304.8mm diameter variety. I'm going to stick with a 7 inch / 180mm simply because I can get the velcro backing and the sand paper.
Inspired by this YouTube video
I've made the height above the bed 100 mm / 3.937 inch and am adding the sanding disc and sanding desk/rest.
Here's the jig I used to cut out the test piece for the disc sander. It's just a small piece of timber with a ledge screwed to it so I could clamp it to the bed of the band-saw. In the bed 90 mm away from the blade is a small 6 mm dowel and positioned so when the stock is turned the leading edge the cutting edge was on the same line as the pivot.
The drill I'm going to use
Bottom view
The design isn't finalised, but it's very close and changes will depend on availability and appropriate choices of some of the solutions to some of the issues I'm going to face.
I've been playing around in my 3d package looking at possible solutions.
The first relies on threading the end of the cut sections to be connected to some 90° threaded corner pieces, that is, if these are available and the pipe can be easily threaded.
The method that will probably be the easiest, will be to cut all the pieces at 45° and weld them together.
The thought that doing this may destabilise the drill press hasn't escaped my attention so fixing the drill press to a solid base will be necessary.
I'll need to be able to get the adjustable table that rides on the post on and off as well so this goes into the decision making pot as well. It does however throw out the fist design in the picture if I can't get the threaded pipe solution up and running.
I'll have to move to just welding the thing, as it won't be possible to get the table around all those angles I'd imagine.
So back into 3d and some real world measurements and the minimum needed to move the pipe is 45.5mm so there'll be no need to be that pedantic and visually it looks like I could take it out a little further.
I'm still waiting on the 50 mm forstner bit to show up but in the mean time I had some cheap nut files show up today.
In keeping with the fact that I'm very poor :-) and echoing the el cheapo mantra I jumped at the bargain.
The fact you'd pay this price plus postage for one file anywhere else, it's a pretty good price for the quality.
You can find them on ebay at differing prices, so shop around sub $24.00 - $35.00 au
It came with a string height gauge that might have either been cut crooked or printed that way :-)
it won't be a problem though as actual numbered measurements aren't as vital as consistency and I'll check them with my vernier calipers anyway.
The 3 files have a different size on each side accounting for all 6 strings of a guitar.
A nut height ruler and string spacing guide is also included along with another plastic gauge for string height and a string winder.