Sunday, 29 November 2015
Tuesday, 15 September 2015
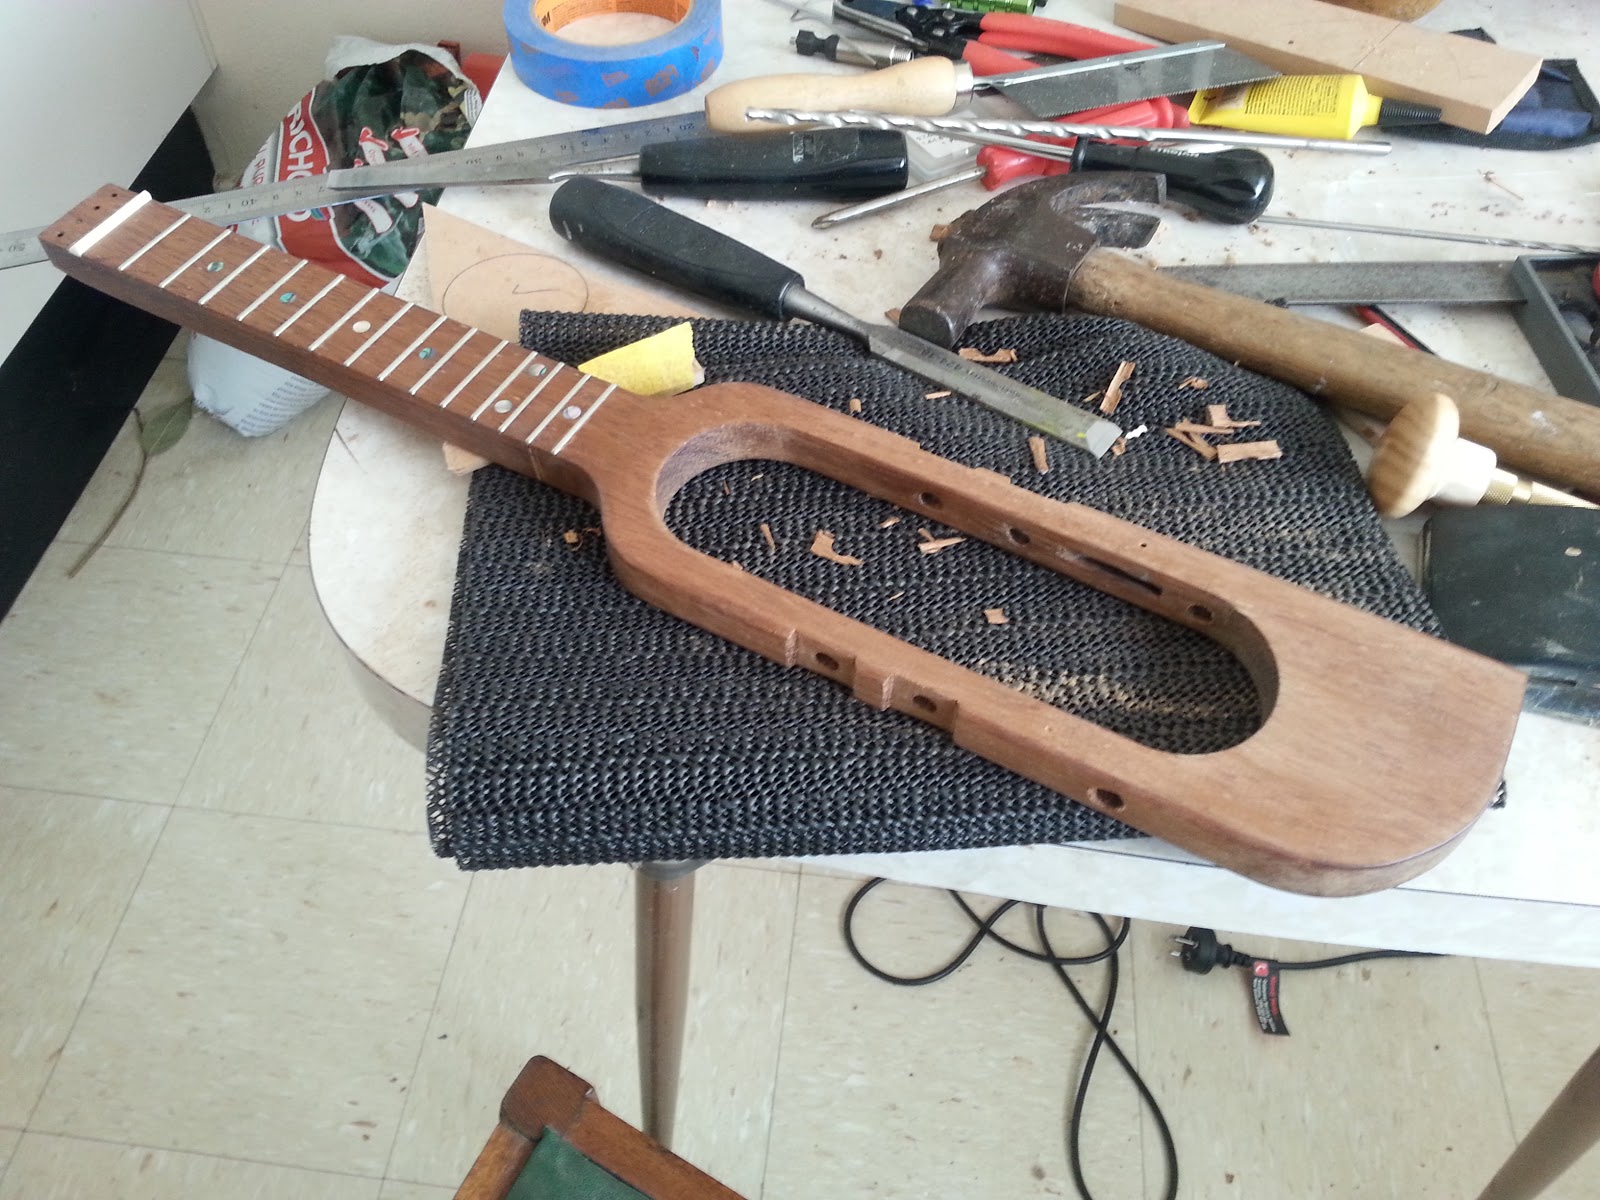
Fret level - Update
Despite having only two strings on my travel uke the buzz along the fretboard was quite bad so I moved the fret leveling up to today rather than wait, as I was going to.
This exposed just how un-level all the frets were. One sitting so low as to be missed completely by the sanding block running over all the others!!!
I'd marked all the frets prior to leveling with a permanent black marker so i could see the progress and wish I hadn't lol
The need to find a better way to install frets is defiantly on the cards. Inspection under a strong magnifying glass reveled just how badly (unevenly) they were seated into the slots. I was so happy and full of my own crapulence prior to this lol
I suspect a press might be a better solution, if you can regulate the amount of pressure so it remains the same over all the frets.
This is not to say, the obvious need for a lot more practice wouldn't go astray either, but since I don't see me being able to finance the purchase of all that fret wire to waste then the next obvious choice is to control the consistency of the installation process.
These notes are as much for my future reference as yours but if someone stumbles into my disjointed rantings and gets the opportunity to not repeat my dopey mistakes then maybe it will be worth it. :-)
I'm still waiting on another $4.00 pickup from China along with the set of $4.00 friction tuners, and have no idea how long this will take.
I spotted this on stewmac
http://www.stewmac.com/Luthier_Tools/Tools_by_Job/Fretting/Jaws2_Fret_Press_and_Inserts.html

I may just try and build one myself I have an old clamp here I could use.
Tuesday, 8 September 2015
It's done! .................sort of..
Well its done!..... except that I lost a screw from one of the tuners and the pickup is only working intermittently.
I'm not sure why the pickup isn't working but it could be a number of things.
1. Maybe, I just bent the pickup wire too many times, it got quite a work out.
2. It was faulty from the get go.
3. My old Gorilla practice tune up amp is crackly at the best of times and could be broken. I've had similar problems in the past which I attributed to other pickups on other instruments, and nothing else to test it on.
What I'd do differently next time hahahaha
1. I'd narrow the distance between the holes I cut for the cut out from about 200mm to 150mm
2. Based on the hole diameter I'd cut the width of the timber down to make sure the tuners didn't need to be recessed
3. To run the pickup wire through the timber I had to drill a hole in the piece of steal that holds the tattoo grip. Next time I'd avoid this with a re design. Although I have no idea ATM how to do this.
4. I'd leave more height on the bridge and lower it during setup by cutting notches so I could control the width of the strings as well as their height. The tattoo grips notches are pretty good but I'd like more control over their spacing.
5. I'd buy much better quality hardware for this once I was happy I had the build process down.
6. Win the lottery and buy somewhere to build this kind of thing, along with some quality tools hahaha. My kitchen wasn't a bad place to build this, but I have close neighbours in my building and I had to consider the amount of noise I could make along with when I could make it.
When I'm fully changed over to Linux from windows and find the appropriate software to do all the things needed and have the uke functioning like it should I'll upload something with audio, probably me playing something.
So thanks for following along and in the future I'll do some videos of me making rather than just this blog with pictures.
Thanks to Daniel Hulbert @ Circuit and Strings https://youtu.be/Aq6sbBtPSHU for the plans and inspiration for this.
Monday, 7 September 2015
Travel Uke very nearly done!
Shaping the neck with the spoke shave

The mess isn't as bad as I thought it was going to be

Checking the neck for comfort

Teak oil going on


Dry fit
I lost one of the screws for one of the tuners
Aaaaaaaaaaaaaaaaaaaaarrrrrrrrrrrrrrrrrrrrrrrr

So far, so good though

I may even need to shim the bridge with some paper but its not bad as is. The nut will need its slots lowered though. Neck shaping tomorrow. The Video will be delayed until I can find or replace the little screw on the tuner.

The strap/jack is going to be a friction fit and I'm using some Teflon tape to take up the slack.
If "IT" hits the fan then I'll use a grub screw to hold it in.


The pickup wire travels through the body and the extra wire will need tiding up somehow.

Sunday, 6 September 2015

Everything done just the neck, setup and finish to go
I haven't done the dry fit with all the bits and pieces yet!
On to shaping the neck with the spoke shave and files sandpaper etc.
When its all done I'll have a little video of the thing being played if I can get over my shyness ;-P
Saturday, 5 September 2015
Work on the bridge
I broke out the dremel (Aldi's version) and with the cut off disc, took to the bridge with gusto.

I cut off the wings simply for atheistic reasons, either breaking a lot of discs or wearing them down to a nub.

The aluminium got really hot, so some multi grips were a deity send. The worn out disc you can see was a sanding disc that lasted a few seconds.

I had to cut the aluminium down to suit the action which won't be finalised until the very end during setup. Broke quite a few cut off discs here as well, these thing break just by looking at the bloody things!!

Here the final product. The white dots and dabs you can see was my attempt to use a polishing pad with tooth paste as I don't have any metal polish. Had you been here you would have had a great laugh at this silly attempt. :-D In the end, some wet and dry 800 600 and 1200 paper was used.

This is the way around the bridge will probably be fitted.

Friday, 4 September 2015
It's wierwing season
Finally braved it and drilled the hole to take the strap jack/pickup jack. You wouldn't believe how many drill bits I used to do this. A small pilot bit, a stepped bit, a variety of other drill bits to enlarge the hole and finally a 1/2 in bit that would only fit in my brace which you can just see in the photo below. It isn't designed to go in the brace, but it did, but got stuck every time, mainly because I couldn't tighten it tight enough.....................so some multi grip pliers were used to remove it each time :-)

I used a long drill bit to extend the hole with a smaller bit for the pickup wire which will plug into the jack. That's the little hole to the right of the tuner peg holes.

Here's the pickup bridge and jack without all its nuts and strap button

Here's the pickup plugged into the jack.
The pickup will be resting on the bridge somehow.

I hope to show you a better photo that explains how this all fits together later, maybe even tomorrow.
Tuesday, 1 September 2015
Fretting done
I guess you'll have to click on the photos to embiggen them to see how the fretting turned out on the weekend. I've thrown a couple of coats of teak oil to see how things will turn out as well.

I've got another two holes to drill for where the string wraps around the tattoo
handle, I'm inserting a bolt in there (With its head and thread removed).
Drilling a hole in the end for the jack/strap button will be fun. I've got a lot of medical
appointments coming up along with a visit from the Census Aholes wanting to waste
my time with a shit load of irrelevant questions.
You'll excuse my paranoia but its probably really someone from housing or centrelink checking up
on me :-)

Going in to the Drs again for my confirmation on my SCC (Skin cancer) on Thursday. I hate
this time of year with a boat load of medical tests... Ultrasound, bone density scan, 6 monthly grease and oil change with the Transplant team at the local Hospital and a load of blood test for every visit.
Tuesday, 25 August 2015
Fretting
I did some sanding until my impatience got the better of me, so I decided to fret the thing.


Tada! filled in a couple of dents that magically appeared somehow. Managed to get glue all over my fingers in my rush to get things done............despite bringing some disposable gloves to the party. It would have been nice had I remembered to wear them hahaha

Powering ahead lol
Looking good after sanding the fret markers. It was a lot easier than I thought it would be. I'm now down to some 1200 sandpaper just to give the finish a fine polish.
Ooooohhhh shiny.

 .
.
Ooooohhhh shiny.

I got around to cutting the cavity with the jigsaw. Now to sand the cuts flat, and cut some recesses for the tuners to go into. ATM the sides thickness is over 16mm and ideally and according to Mr Daniel Hulbert 12mm or 1/2inch is preferable.
 .
.
If you notice, the uke is leaning against two cylinders, one is a pepper container the other is a spice container both will be used to wrap sandpaper around for sanding the inside :-)
Fret Markers
Glued in the fret markers this evening 25/8/2015 @ 7.00pm.
Some of the Abalone shell is sitting a little (too) proud and I haven't sanded any to date so we'll
see if I've fornicated it up in the morning.
The depth stop on the drill press wasn't used just a bit of masking tape which disintegrated
almost immediately.......of course!
The side markers went well and din't expect any problems with that.

Monday, 24 August 2015
Some progress on the Travel Ukulele
Ok finally got around to cutting the corners on the TU.
Up next is some sanding to remove some of the splinters
my hand is full of them.
I'll probably use the jigsaw to remove the centre between
the two holes soon.
I have to drill a hole in the rear for the jack (that will be fun!)
I'll be installing some fret markers as well so some drilling for those as well
Rounding the neck with rasps and files and installing frets but frets first I think.

That thing removed from my hand is a
Squamous cell carcinoma
Squamous cell carcinomas (SCC) are less common than basal cell carcinomas (BCCs) and account for approximately 25 per cent of all skin cancers. They are not as dangerous as melanomas but can potentially spread to other parts of the body if left untreated. An SCC may appear as a thickened, red, scaly spot. It may bleed easily or be ulcerated. An SCC usually appears on areas of the body most often exposed to the sun and usually grows over some months.
They all speak in acronyms and have another appointment to see them soon to find out more
Sunday, 16 August 2015
Update
I used some brass rod and an old guitar jack to make a tool to help install the jack part of a pickup install. The brass rod is about 400mm long. This gets inserted into the drilled hole the jack will be mounted to and pokes out or near the sound hole where you then put the jack onto it and slowly pull it back toward the hole to screw the little nut on.

I had an alien entity cut off the back of my hand on Friday

I had to clean up and organise my tools etc so I took my trays and tool hold and screwed them to a piece of plywood I had earmarked for my router table build


I got some magnetic tool holds a while ago and finally screwed them to the back of the cupboard doors, boy are those magnets strong.

Here's the progress on the travel uke, I managed to befriend a new neighbour and borrowed a belt sander to help me with some of the sanding but had to give it back so I'm back to hand sanding, I wont be able to do any until my hand heals a little more I'm a lefty and my stitches are on my left hand.

Friday, 24 July 2015
So much for that's it for today :-)
Not that you can see all that clearly in this photo but I've drawn out the rest of the cut lines for the neck and shoulders. I've also decided to use a pre cut plastic nut and have outlined a trench for it to sit in.
With a sharp craft knife and a no 7 blade I've started the frets slots with a few light cuts at their positions ready for the saw.
 |
| Click on the picture for a larger version |
The gloss on the timber is the pva glue I used as a grain filler.It's turning out to be a bit slippery but it also protects the timber from slipping accidents.
It could be that the 200mm distance between the holes could have been 150mm but we'll see I guess
Some serious progress on the Travel Uke
In order to run the strings through the neck we need to drill some holes into the head stock end.
I'm using this tiny counter sink drill bit to drill through the top to make the holes and then from the back going deeper to engage the counter sink section to make the hole larger.
This way the string will have a knot tied into it at it's end so it gets trapped inside the hole.


Drilled in the front

From the back through to the countersink section of the drill bit.
I got a lot of tear out and in hindsight using another drill bit with more flutes may have prevented this. The timber is prone to this though so it may not have.

Cutting things to length. I have some issues with square and I'm not sure it's this cutting jig or my combination square.

I drilled the two holes with my 57mm Forstner bit. I drilled through until the tiny point poked out the other side then flipped the timber over and drilled in from that side. This reduced the chance of tear out. What a mess, it took longer to clean up than it did to drill the holes lol

The drill bit got a lot of residue on it that had to be cleaned off.

Here's the finished photo for today. So it's been layed out with pencil and rulers etc then cut to length then the holes were drilled into the head stock. Then the open section was started by cutting the two holes which will be joined up with a jig saw. I'll have to wait till next pay to get another jigsaw blade.
My dear mum came over earlier in the week and we had a meal at the football club next door (her shout) as she left she slipped my some cash to "Get some groceries" so I've ordered a cheap piezo pickup. I had to get this one so it would fit into the 19mm thickness of the timber I have. Time will tell if I've done the right thing and how I'll fix it, may come down to that universal fix it Silicone lol

The keen eyed of you will see I've got about 14 or 15 fret marks on the paper template This is something I'll adjust as I go and as the design dictates. The distance between the outside of each hole is 200mm
Subscribe to:
Posts (Atom)