I have repaired a music stand in the past, about 3 years ago, using the hardware taken from the broken one. After some really fancy design work and some real headaches trying to print it, I realised that 3d printing and beautiful design weren't going to be as compatible or go hand in hand as I had once hoped.
So the reason this has the flat top is so I could print it flipped upside down which worked really well.


So...........I decided to NOT make it collapsible through folding.
You will be able to collapse it down into something that takes up less storage space though.


These are the Fusion360 screen shots so I hope it is clear about how it will work.
The centre pole is the same size that the Turntable takes as are the legs. It uses one piece of dowel 2.4m long x 22mm diameter.

$15.79 Aud so about 50c in the states and Europe ;-D
The M6 I had here already but might cost about $3-$10 including nuts.
This size is very common here and many many broom handles both metal and wood are this thickness (I checked with some vernier calipers while I was there in the hardware store)
So I intend that the centre post be somewhere around 900mm to 1200mm long probably more like 900 though and the 3 legs to be 400mm long. They will be held by some M6 bolts and nuts. There is provision for some captive nuts in the design.
A 9 hour test print is now underway so I'll know if my allowances for the pole's potential inaccuracies in thickness during manufacturing are anywhere near enough, some time this evening.

Ok my first modification :-) I made the wall thickness for the legs a little thinner as I think I might have gotten a little carried away and over built it.

Now a little thinned down it should even speed up printing. I reduced the infill for my test print to help speed things up, along with increasing the layer height and have knocked down the print time by an hour or so.
-------------------------------------------------------------------------------------------------------------
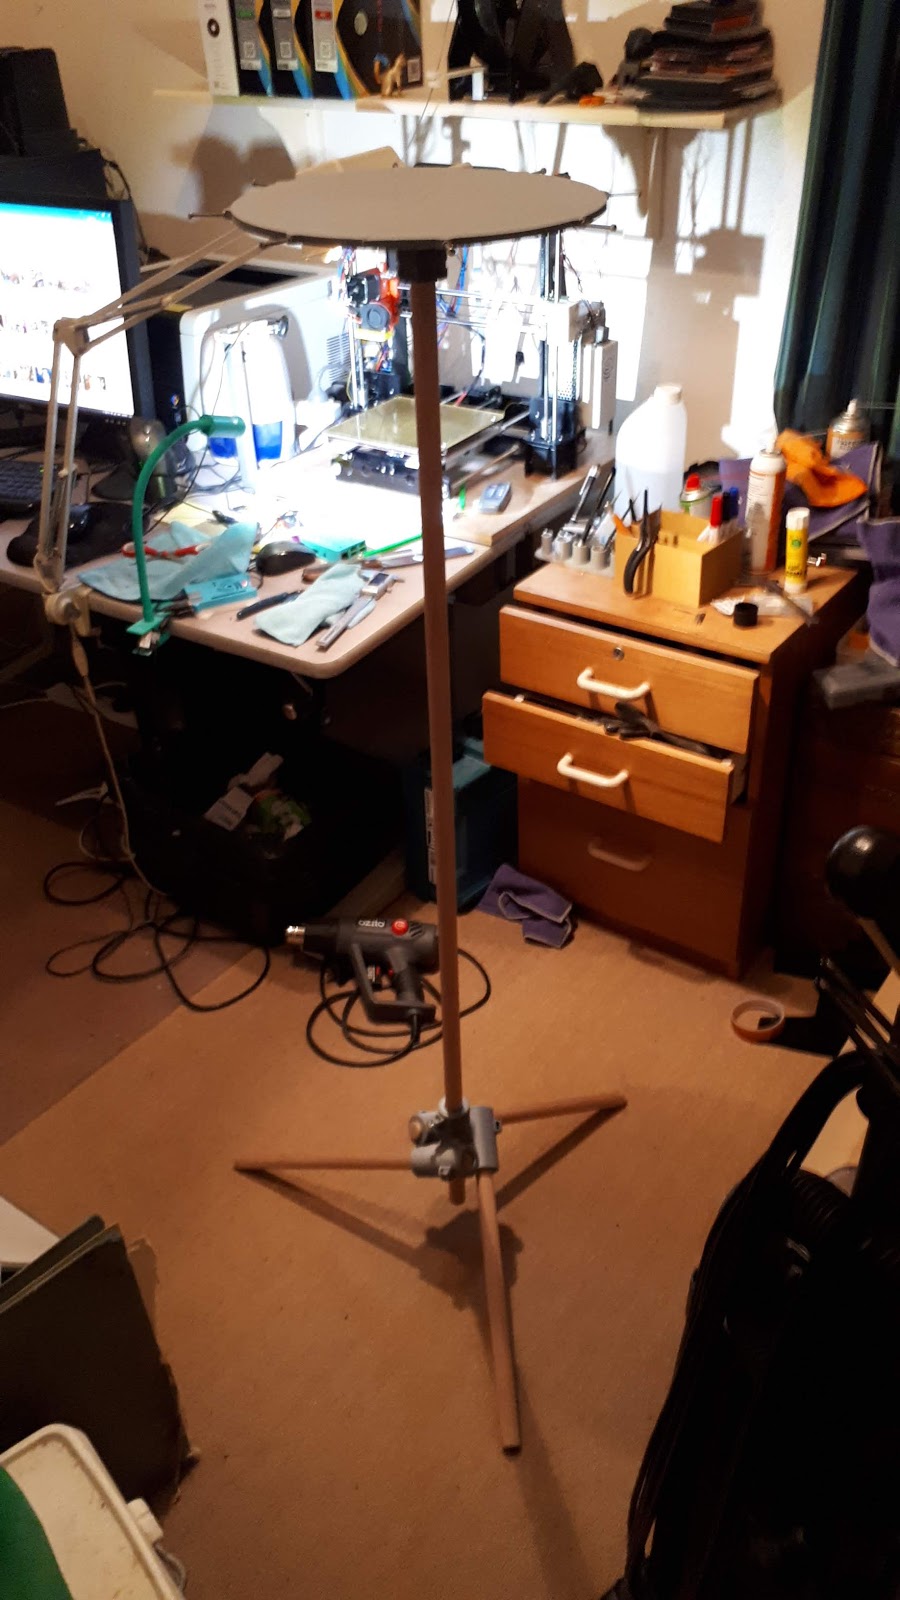
Well that took about 12 hours :-) and it works really well..............Woo Hoo. I need to make the nut housings a little bigger so it's easier to fit them.
The pole in these pics hasnt been shortened yet and is way too tall. I'll cut it down in the morning. I'll act out painting with a spray can and my trusty old W77 spray gun to see where it is most comfortable and use that to set the height.
I'll make the changes and post the free files soon.


No comments:
Post a Comment