Sunday, 15 March 2015

15 Foot Radius Dish

My 15' Radius Dish arrived today. I seriously thought making it myself but making the jig and the mess it would have created made me think twice so I decided to buy one locally (Australia)
AU $115.00 including shipping seemed like a good buy at least to me.


The following video I chose at random from a wide selection of videos on the topic to show how they are used for sanding but they also are used for gluing braces on in a go bar deck.


Finding sand paper to fit this size isn't easy so far in Australia but I've found some in the states

I'll wait until the Aussie dollar climbs back up before buying though 0.76 US Dollar atm !!!!!!!!


Friday, 6 March 2015

Aaaarrrrrrrrrrrrrrrrrrrrrrrrrrr Plate Jioner

I was working on the plate joiner this morning using 15 mm ply board. At $40.00 a sheet it pushed my finances this week and it seems you get what you pay for.

Not that there are many choices in Aust with both our major food conglomerates Coles and Woolworths buying up all our major hardware stores and running them like a food store.

The bloke cutting the sheet in half for me so I could easily transport it told me they (Woolworths) were going to take their panel saw off them, so they were now forced to charge for cutting. How the fuck do you run a hardware and timber store without a basic cutting service? The current available selection of even basic hardware is is bad enough!

The only other option would have been marine ply, a ply that uses a waterproof glue and costs more than I'm able to afford. Yet still no guarantee that it wouldn't have broken I suspect.


Here I'm cutting the halving joints three at a time so alignment won't be an issue and that the sizes of the cuts will be exactly the same.


This is the piece that broke without a sound. The joints were accurate and firm fitting and in hindsight could have been looser in order to avoid them breaking. Bloody shitty ply board!!!!

So do I just re-cut the broken piece or do I redo all of it in another solid timber? Radiata pine? Tassie Oak or some Aussie hard wood that you need diamond saws to cut through :-)

And this is my dilemma do you go for something that is easy to work with ie cut with the tools you have available or do you go for the even more expensive route and work with materials that require a lot of very hard work to work as it were.
I guess the other option is to not be so rigid in the way you want to work, there are other ways to join two pieces of 2/3mm plate of timber I guess.

Mmmmmmmmmmm


Wednesday, 4 March 2015

Plate Joiner

I've been cutting the 15 mm ply for this build this afternoon. Originally I had an aesthetic design, as in the picture below, buuuuttttt the reality of my limited tools and work space made me realise I needed to simplify the design by way of simplifying the kinds of cuts I'm going to use. 


I've modified the top left, light blue cross member in this design, so it's just square cuts and I'll do this for all the pieces. What I can do later on is then come back and add in the angles if I want.

This grates on my ocd design sensibility like you wouldn't believe lol

Here's another view


See this page for a youtube video on which the design is based


Temperature test 1

Dial on 1/5 mark


After 10 mins it's off the scale. I couldn't wait for the digital thermometer to arrive so I got this $6.00 one at the outlet centre :-P


 You can't see it here, but water sprayed onto the steel boils instantly


I'll do some more research on youtube to see what temps people are using. I seem to remember seeing someone having around 170 Celsius and this passed 200.


Setting the temperature The bender's highest temperature is approximately 500°. A good bending temperature is between 350° (°C 176.66667) and 400° (°C 204.44444). A surface thermometer placed on the aluminum iron is the best way to monitor the temperature. A hotter iron steams the wood faster, but also dries it out faster, so it needs to be wetted again. 

I'd suggest now that 400 watts was overkill and could have easily gotten away with 100w
Mold Heating Element Cartridge Heater 12.6" Wire 220V 400W 12mm x 200mm
I re-checked ebay and could find what I was looking for at a lower wattage so beggars can't be choosers I guess.


On to the next thing on the list now 

Tuesday, 3 March 2015

Bending Iron

Errr well box complete.
I must confess it started out as a well made box nice and neat, but "one sloppy cut" forced me into moving this into the "This is the prototype" until I get some more timber classification hahaha


It works well enough but I didn't run it at full power and not for very long. I'll do the full test when the digital thermometer shows up. The white tape you can see is plumbers Teflon tape used as both an insulator and wedge to take up the difference between the pipe and mdf. (It could use a little more)


I don't think it will be all that efficient on electricity as the heater slips in the aluminium quite easily and contact between all the components could be a lot better.


When the thermometer shows up I'll be testing it at the 5 settings that you can make out on the centre picture, These are just eyeballed marks I put on the face-plate and I'll put the temperatures on when I know them.

Monday, 2 March 2015

Bending Iron cartridge heater

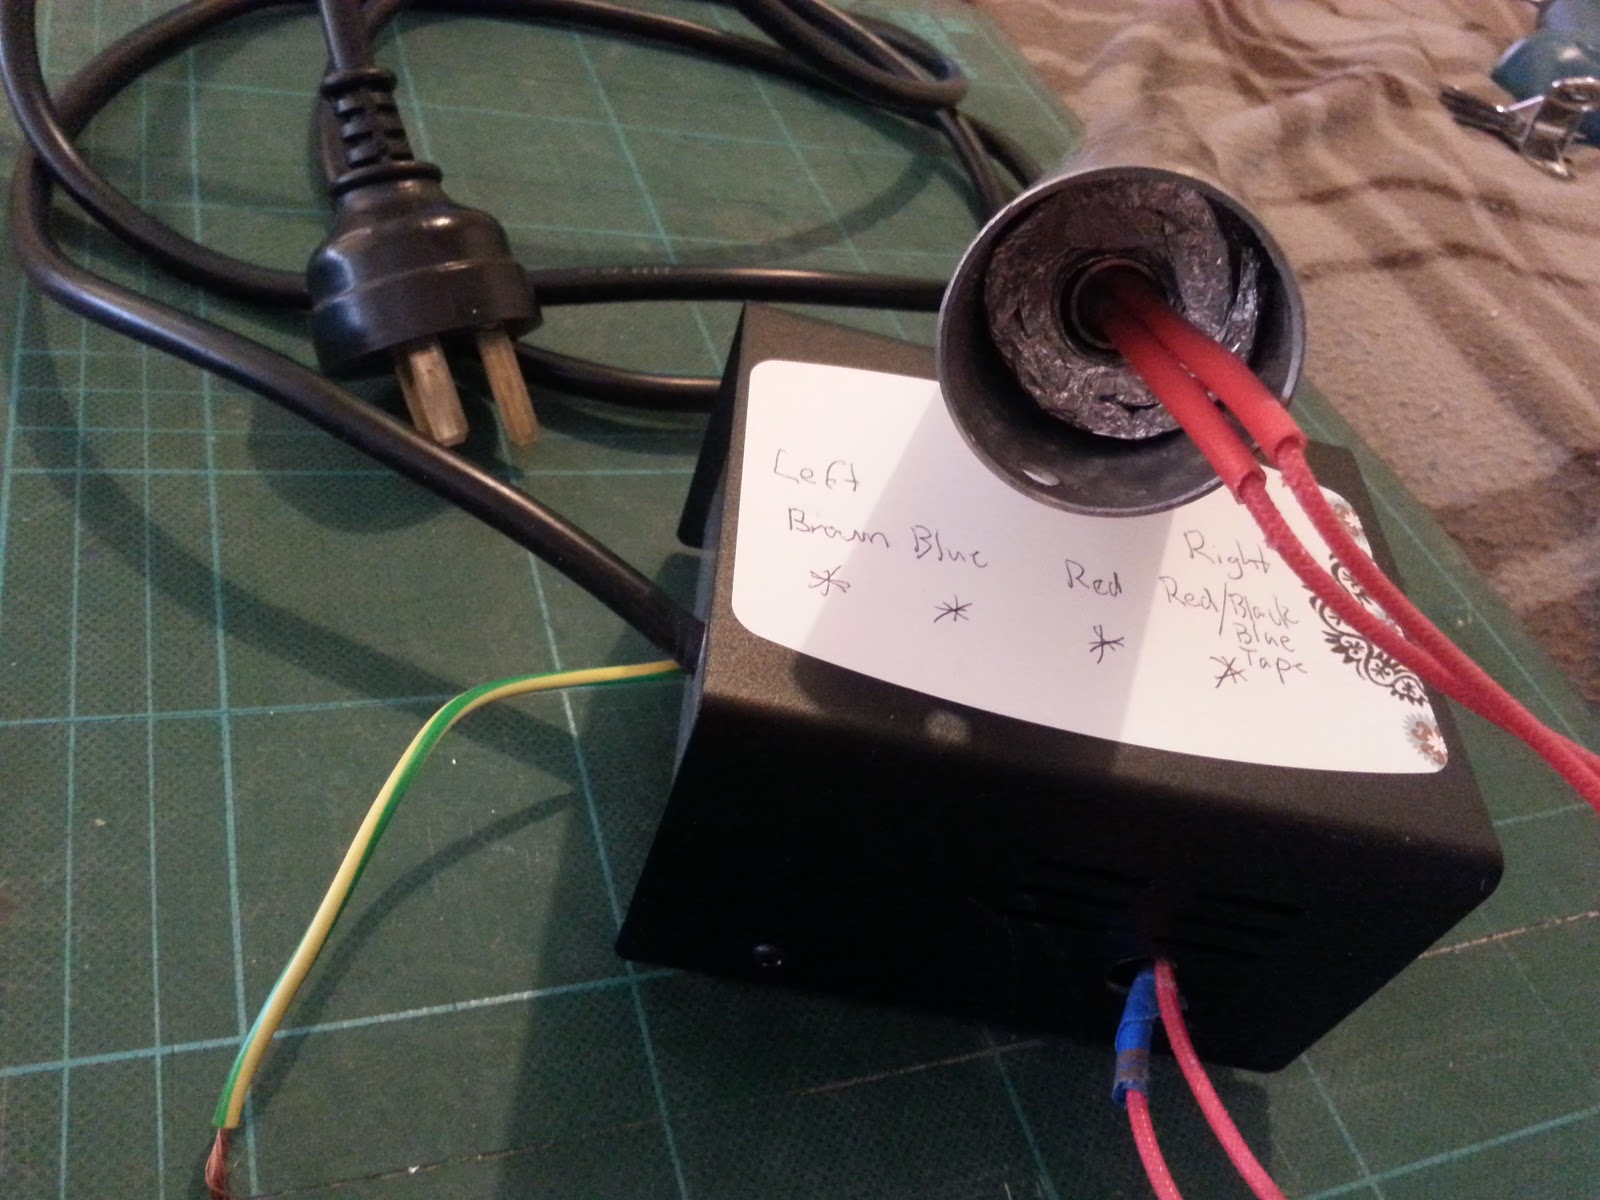
Ok I've stuffed the iron with Aluminium foil and inserted the heater. Time and testing will tell if the foil is packed in around the heater tight enough.


The label on top of the temperature controller is just my reminder of the wiring diagram.
I'll start on a box to hold it all tomorrow. I'm also waiting on a digital temperature probe which will be inserted in the end for repeatable temperatures.
I found some cheap digital controllers which will set and hold a temperature for a set time on ebay and might look into fitting one of these but this iron was only supposed to be a stop gap measure until I could afford a silicone heating blanket, so we'll wait and see. Wiring it up could be a nightmare as these things can be wired a number of different ways.

Making a dowel gluing trench

After discovering that the paper and glue technique wasn't well known I thought I'd post this little trick for when you are making your own dowels.
After you've sized your dowel rod (they are rarely the size they claim to be) you'll need a way to let glue squeeze out without it being all squeezed out and trap enough to make your joint strong.
The 3d drawings should be self explanatory but I'll describe it anyway.
Get a block of wood and drill a hole near and edge the same size as your dowel. Hammer a small nail into to side so the tip pokes into the hole, chamfer the dowel a little to make it easy to insert into the hole and hammer the dowel through the hole allowing the nail to scratch a trench into the dowel. You can do this a few times rotating the dowel before each pass through the jig, one will work, 4 might be better. Then just trim you dowels to the desired length and use. The small trenches will allow glue squeeze out and also trap glue in the trench which should add to the overall strength of the joint.


Using Paper Glue Joints for Woodturning Projects

I was watching this and taken by surprise at how little this technique was known. I thought it was a standard technique!


In the early to mid 70's in high school we had gotten around to lathe work and we had to turn a bowl that had been made by laminating strips of Pacific maple and radiata pine.
After gluing we roughed out the shape and then shaped the back ready for gluing the platen onto the back using newspaper and glue.

I've still got that bowl

It was finished with a very traditional french polish


Evidence of the newspaper still on the back. If you can make out some red hue on the paper it was because my teenager self thought it would be funny to say "Made in Japan"
I don't know if the type of chucks available today were available back then because we would have been learning these old techniques on purpose.

The platen paper and glue held really well and removed pretty easily, removing the rest of the paper would have been pretty easy as well and can't remember if I was just lazy or if there was a reason I left it in this state.